Technical comments regarding illustrations provided by Mike Belzer
and Joseph Svinth. Copyright © EJMAS 2000.
Note: So that they better match the text, the numbers of some figures have been changed from the original.
Overall technical assessment of this section: The attacks shown would be sensible if the setting were a self-defense class for high school girls, but are improbable given the military hand-to-hand setting. Meanwhile the defenses shown are too complex for a recruit training scenario.
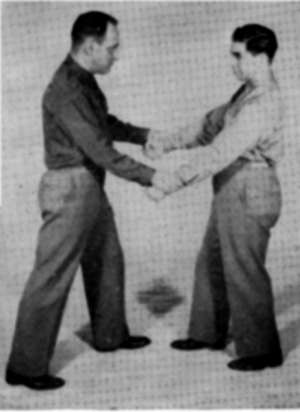
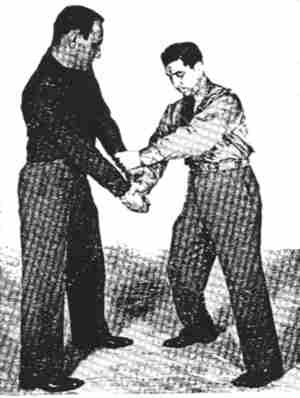
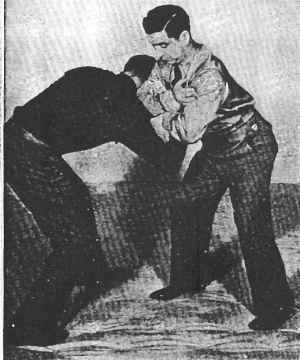
8. DEFENSE AGAINST TWO-HAND OVERHAND GRIP ON BOTH WRISTS (SIMPLE). -- You are grasped by the wrists in the manner illustrated in Figure 3-1.
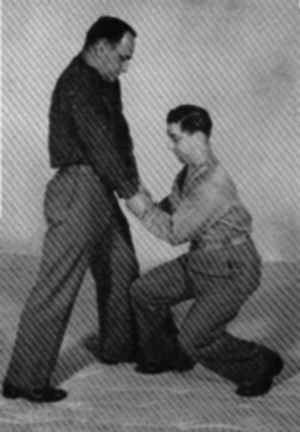
You immediately step forward with either foot, in this case (Figure 3-2) the right one, at the same time bending the arms so that the elbows are close to the lower abdomen.
The escape is accomplished by straightening the legs, pulling back with the body, and pushing the arms upward in one motion (Figure 3-3).
The faster this defense is worked, the more effective the escape.
9. DEFENSE AGAINST TWO-HAND OVERHAND GRIP ON BOTH WRISTS (ADVANCED). -- Figure 3-1 is the original hold.
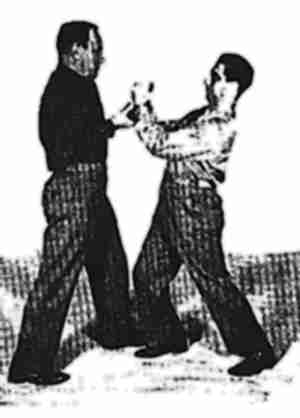
Figure 4-1 illustrates the first movement, in which your right hand reaches across and grasps your opponent's right wrist.
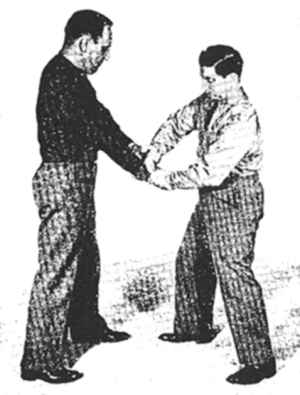
Following this movement, the left wrist is pulled out of the grasp of your opponent's right hand by pushing with your right hand and pulling with your left arm. Figure 4-2 illustrates that you have reached across with your freed left hand and grasped your opponent's left wrist with your thumb up.
By pulling on his left wrist, you will find no difficulty in releasing his grip on your right wrist.

Figure 4-3 illustrates the completion of the defense, showing that you have lifted your opponent's left arm over his right forearm and have him in a position where you will have no difficulty in snapping his left elbow. [Technical comments: The defense shown is too complex. Furthermore, Defender is vulnerable to a front kick from Attacker's right leg, and Attacker needs merely move his feet to escape.]
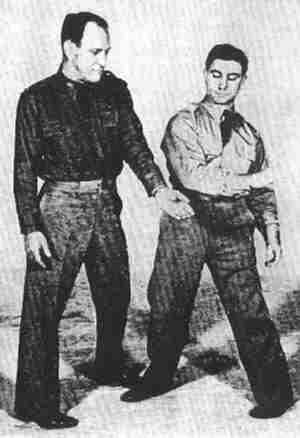
10. DEFENSE AGAINST TWO-HAND UNDERHAND GRIP ON BOTH WRISTS. -- Figure 5-1 illustrates the original hold. [Technical comments: In Danzan Ryu this escape is known as ryote hazushi. Defender's more sensible first response is either to raise his left knee into Attacker's groin or to deliver a front kick with the left leg to Attacker's left shin.]

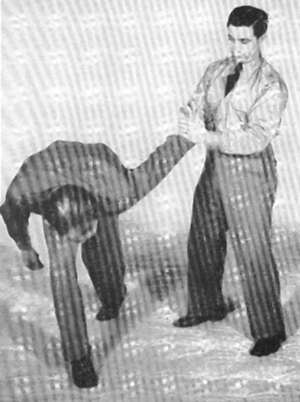
This defense is just about the reverse for that for the two-hand overhand grip on both wrists. The elbows are again brought close to the lower abdomen and a step forward is again taken as illustrated in Figure 5-1. Then, turning the head to one side to avoid bumping heads with a hardheaded opponent (Figure 5-2), the body is bent swiftly from the waist. [Technical comments: An easier and more effective response is for Defender to bring his hands down on Attacker's comparatively weak thumbs.]
At the same time, pressure is brought to bear on your opponent's thumb, accomplishing the escape as in Figure 5-3. [Technical comments: By bending at the waist, Defender has broken his own center and made himself vulnerable to Attacker's knee into his head.]
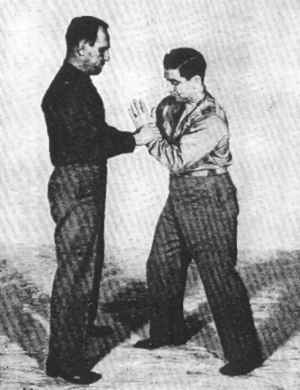
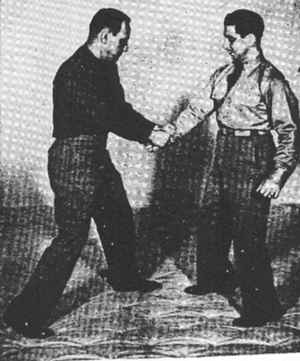
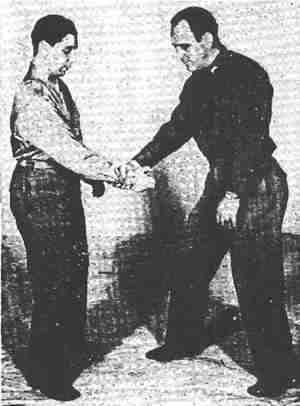
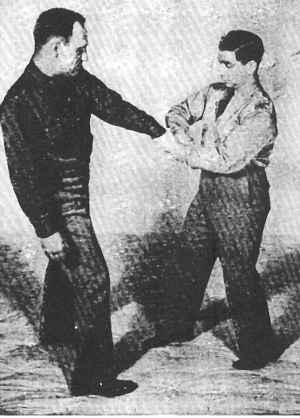
11. DEFENSE AGAINST LEFT-HAND GRIP ON RIGHT WRIST, OR RIGHT-HAND GRIP ON LEFT WRIST (SIMPLE). -- Figure 6-1 illustrates the original hold. Your attacker has grasped your left hand.
Your immediate action is to pull your left elbow close to your internal oblique muscles (see par. 7b), step forward with your right foot, and by pushing with your body, attempt to touch your right elbow against your opponent's left elbow, at the same time turning the palm of your hand toward the floor as illustrated in Figure 6-2.
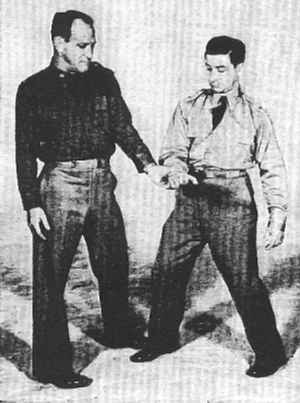
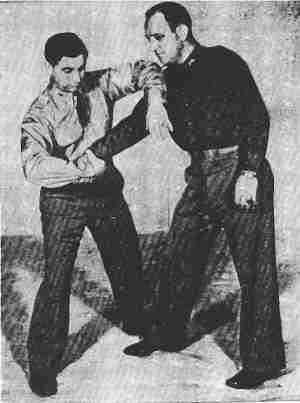
Figure 6-3 illustrates the completion of the escape, showing that your right hand is then in position to be brought smartly across your opponent's neck.
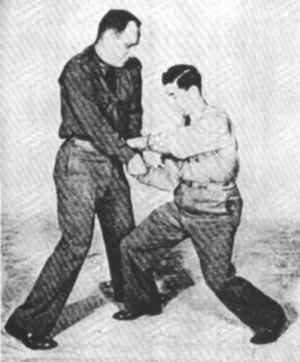
12. DEFENSE AGAINST LEFT-HAND GRIP ON RIGHT WRIST, OR RIGHT-HAND GRIP ON LEFT WRIST (ADVANCED). -- The original hold is the same as in Figure 6-1. This time, however, your defense will be such that you can take your opponent prisoner. Reach across with your left hand and grasp your attacker's left wrist as illustrated in Figure 7-1. [Technical comments: Defender is using two hands against one; Attacker's counter could be a palm slap to Defender's hand, or, if he is more aggressively inclined, simply stepping into Defender, locking his arms and threatening his head.]
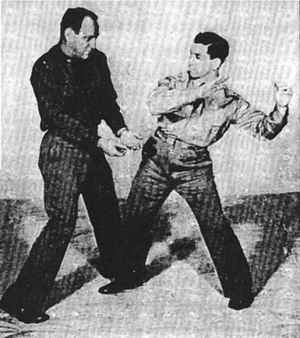
Then, by bringing your elbows as close to your shita-hara [abdomen] as possible, you will turn your opponent's left hand to your left, applying pressure against his thumb as illustrated in Figure 7-2.

As you turn the wrist, the thumb of your left hand is placed in the center of the knuckles on the back of your opponent's hand. As soon has your opponent has been forced to turn his back partially to you, you will then reinforce the hold with your left hand with an identical one with your right hand. This will bring you to the position illustrated in Figure 7-3. [Technical comments: This is katate tori-"C".]
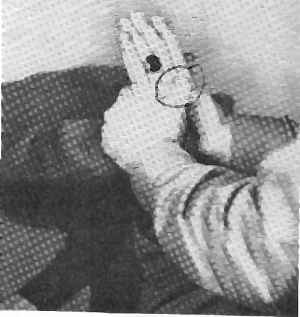
The close-up in Figure 7-4 shows you the proper hold on your opponent's hand. [Technical comments: The crossed thumb grip is strong, and works well on an untrained and unsuspecting opponent.]
The pressure, when it is necessary, will be applied toward your opponent's forearm rather than to either side. Your elbows will be kept close to your side. All pressure will emanate from the shita-hara. You can now march your opponent anywhere you see fit. He is your prisoner. [Technical comments: This conclusion is exaggeration, as if Attacker puts his thumb on his little finger and then steps forward using the hip rather than his shoulder, he escapes this grip quite casually.]
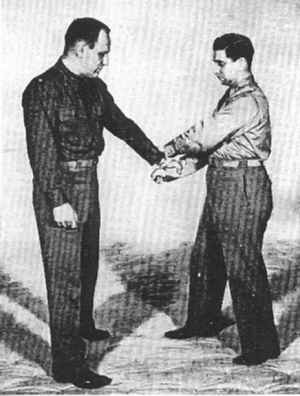
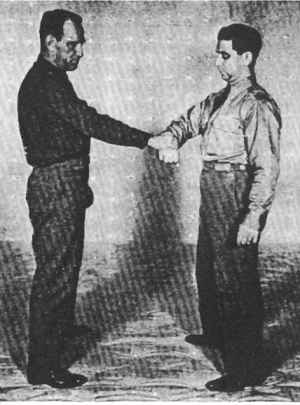
13. DEFENSE AGAINST TWO-HAND GRIP ON ONE WRIST. -- Figure 8-1 illustrates your opponent grasping your right wrist with both his hands.
Now step forward with your right leg, bending both knees, body upright, and bring your right elbow close to your shita-hara. Your left hand will reach across and grasp your right fist. The position is illustrated in Figure 8-2. [Technical comments: The position is morote hazushi. However, Defender should step to Attacker's outside rather than his inside, otherwise Defender's knee can be buckled by Attacker's.]
By straightening your legs, pulling back with the power of your body and of your arms, pressure is brought to bear on your opponent's thumbs, forcing him to release his hold. Figure 8-3 illustrates the completion of the escape, placing you in position to retaliate with a backhand with the edge of your right hand to your opponent's jaw or neck. [Technical comments: The retaliation is good, but Defender should be closer to Attacker and avoid breaking his own center.]
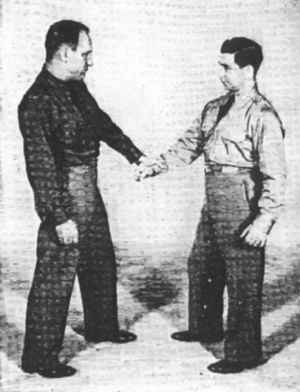
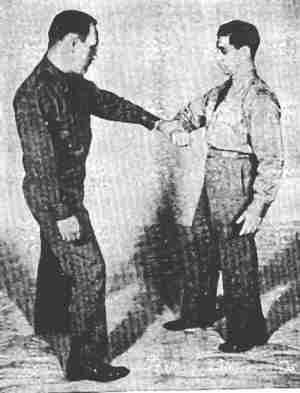
14. DEFENSE AGAINST RIGHT-HAND GRIP ON RIGHT WRIST, OR LEFT-HAND GRIP ON LEFT WRIST. -- In the case illustrated by Figure 9-1, your opponent has grasped your right wrist with his right hand.
Your immediate reaction is to grasp his right wrist with your right hand, taking a long step to his right rear with your left foot, pulling his right arm underneath your left arm as illustrated in Figure 9-2. [Technical comments: Although Defender did the right thing by stepping outside, he has not stepped in close enough to make the technique work and missed the opportunity to strike Attacker's head using his left elbow.]
Wrapping your upper arm over your opponent's upper arm and bringing your forearm or wrist underneath a spot about 1 inch above his elbow, you will then clamp your left hand on your chest as illustrated in Figure 9-3. [Technical comments: The movement is called akushu ude tori. As shown, Defender has a weak grip. To escape, all Attacker needs do is step into Defender with his near-side foot and knee while simultaneously relieving pressure on his locked arm by slapping the trapped elbow joint with his free hand.]
You are now in position to bring pressure on either your opponent's elbow or his ulna nerve by pulling up with your left forearm and pushing down with your right arm. This will force your opponent to his toes and give you complete control of the situation. Care should be taken in working this defense, since it is very easy to break an arm utilizing this procedure. [Technical comments: Injury results only if Attacker panics.]
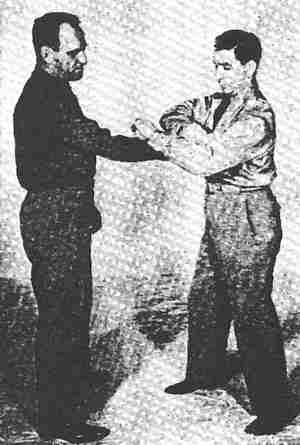
15. DEFENSE AGAINST LEFT-HAND GRIP ON RIGHT WRIST, OR RIGHT-HAND GRIP ON LEFT WRIST (FINGERS UPPERMOST). -- Figure 10-1 illustrates the original hold, showing your opponent grasping your right wrist overhand with his left hand.
Your immediate reaction is to reach across with your left hand and grasp his wrist with your thumb uppermost, at the same time stepping forward with your right foot as illustrated in Figure 10-2.
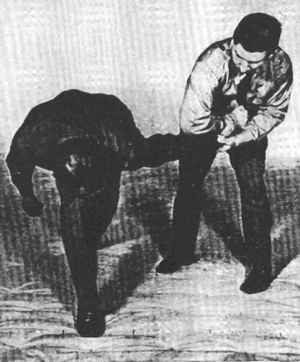
You then prevent him from releasing the grip on your wrist by pulling with your left hand, keeping it close to your right. You then endeavor to place your right elbow on your opponent's left elbow by pushing with the body and arm and continuing the pressure. This will bring him to the position illustrated in Figure 10-3 or completely to the ground. If done rapidly, it can also result in a broken arm. [Technical comments: Defender now has good leverage, but is standing too far away to have anything resembling control, and to escape, Attacker needs merely step forward from the hip. Also, attacker's arm is unlikely to be broken, as the untrained and panicking Attacker will go to the floor while the trained Attacker will quite easily extricate and escape.]
16. DEFENSE AGAINST RIGHT-HAND GRIP ON RIGHT WRIST, OR LEFT-HAND GRP ON LEFT WRIST (FINGERS UPPERMOST). -- This, on the surface, appears to be the same hold as in Figure 10-1, but it is not, since in one case the grip is with the hand on the same side, and in this case the grip is from the hand on the opposite side as illustrated in Figure 11-1, where your opponent is grasping your right wrist with his right hand.
Your first action is to place your right hand on your right biceps and your left forearm over the back of your opponent's hand, preventing him from releasing his grip, as illustrated in Figure 11-2.
Continue the movement of your left hand to the right, bringing it over the back of his right hand, under your right forearm, and locking it on your right biceps as illustrated in Figure 11-3.
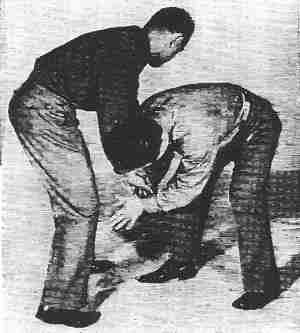
Holding him close to your chest, it is a simple matter to bend from
the waist and thus force your opponent to his knees. [Technical comments:
Although an effective technique, it is far from simple to get it on a resisting
Attacker!]
About the Technical Commentators
Mike Belzer began practicing Kodenkan (Danzan Ryu) jujutsu at age 9, and in 1974, at age 18, he met and trained with Donn F. Draeger and Takaji Shimizu in Japan. In 1979, after returning to the US from a trip to Malaysia with Draeger, he also began studying Filipino kali under Dan Inosanto. Since 1990 he has focused his training on using "adrenal-stress conditioning" in realistic scenarios against heavily padded assailants. He is presently ranked 5-dan in Kodenkan jujutsu and apprentice instructor in kali, and serves as a consultant to the Los Angeles Police Department's Civilian Martial Arts Advisory Panel (CMAAP).
Joseph Svinth is editor of Journal of Non-lethal Combatives.